Yes. You CAN do this. Homemade bread is not mystery. It is simply a learned skill. And if you are like me, it helps to have lots and lots and lots of pictures...
So, if you have a stand mixer and want to make yummy bread and rolls, then this blog post is for you.
Growing up, my mom made homemade bread all the time. It was fabulous. To my knowledge she never used a mixer, but I can remember kneading, and kneading, and kneading the bread dough. When I tried making bread as an adult, I did the same thing. I'd knead the bread a lot, adding flour as I went to make sure it wouldn't stick.
I baked bricks. They were terrible. Sure, the TASTE was alright, but who wants to eat bread-flavored rocks? Not this girl! So, I gave up. I had a short affair at one point with a second-hand bread maker that resulted in a few small, under-risen loaves and trip to the local dump to drop the offending appliance. Despite the raging success that others have had with those contraptions, a bread maker just wasn't for me.
Enter, the stand mixer.
I picked up this baby from a friend at a church swap 'n shop shortly after I moved to Oklahoma. It has been my best friend in the kitchen ever since.
Especially when it comes to making bread.
The problem with my previous bread-making experiences is that when I knead bread is that I add way too much flour in the process. I just can't be trusted with it, and so I end up with dough that is way too stiff and dense. However, kneading bread does something very specific to the dough so that it will stick together when you try to slice it for sandwiches. Fortunately for me, this can be accomplished in the mixer without adding excess flour just as easily as it can on the counter kneading for 10 minutes. In fact, it can be done
easier in the mixer because I can walk away while it's working!
The recipe I'm going to post here I got from a lovely lady named Melissa who did a food storage presentation at my church. She passed out a single page (front and back) of recipes, and this is the one I have used the most. (Check out her blog post about the recipe it
here.) Since then, I've had to modify it a little to scale it down to fix my mixer, which fits two loaves of bread perfectly, not three. This is the recipe I use the most for everything: dinner rolls, loaves, cinnamon rolls, etc. Sometimes I make it with white flour only or wheat flour only, but usually I use a combination of white and wheat.
If you are going to attempt using store-bought whole wheat flour for the first time, I suggest the Gold Medal Ribbon brand. I've also tried Hogsdon Mill, but found that it wasn't ground as fine as the other. Coarse flour = coarse bread that doesn't rise well. Trust me. You want finely ground flour.
THE Bread Recipe
2 cups warm water
1/4 c honey
1 Tbsp yeast
1/4 oil (I use canola)
2 tsp fine salt
1 egg
6-1/3 cups flour + extra
Place all of the ingredients (except for the flour) in the mixing bowl. Add 3-2/3 cups flour, and mix on low until everything is barely combined. Then, turn the mixer up to medium and let it beat for an additional 4 minutes. (If I am making white-wheat bread, then I ALWAYS add my wheat flour first. It needs more beating time to get the gluten working the way you want it to.)
This is what the dough looks like when it's barely started mixing. See how lumpy and chunky it looks?
Here it is again 4 minutes later. It's smoother, but it's also starting to get more elastic and stringy. The dough wants to stay together. This is good!
Add another 1-1/3 cups of flour and beat an additional 2 minutes with the beater bar. Then take out the beater bar and replace it with the bread hook attachment.
At this point, you can really see that the bread dough is sticking together. I usually have to scrape off the dough with a butter knife or my fingers.
Finally, add your last 1-1/3 cups flour and mix it with the bread hook. Let it mix until all of the flour is worked in and the dough has come together in a clump on the hook.
If you are doing all white flour, you may need to add a little more flour at this point to get the bread to the right consistency. The dough should be slightly tacky, but not so sticky that it comes off onto your finger when you touch it.
Place the dough on a clean, lightly floured surface and knead it just a couple of times to get a nice shape and light coating of flour to remove the tackiness.
Drizzle a little oil into a clean mixing bowl. It shouldn't be more than a tablespoon or so. This is what my bowl looked like after I had swirled it around a little.
Place the ball of dough in the bowl and give it a twist to coat the underside lightly with oil.
Then flip it over in the bowl. This light coating of oil will keep the dough from drying out while it rises.
Cover with a clean towel and put in a warm place. (Don't leave it on the stove top unless you aren't using you aren't cooking or baking - that's a bit too warm.)
Let it rise until it's nicely mounded in the bowl - at least double in size. The exact rising time will depend on various factors - yeast freshness, type of flour, temperature of the room - so I usually plan on a couple of hours. In the warmer summer temperatures, it usually takes only an hour or so.
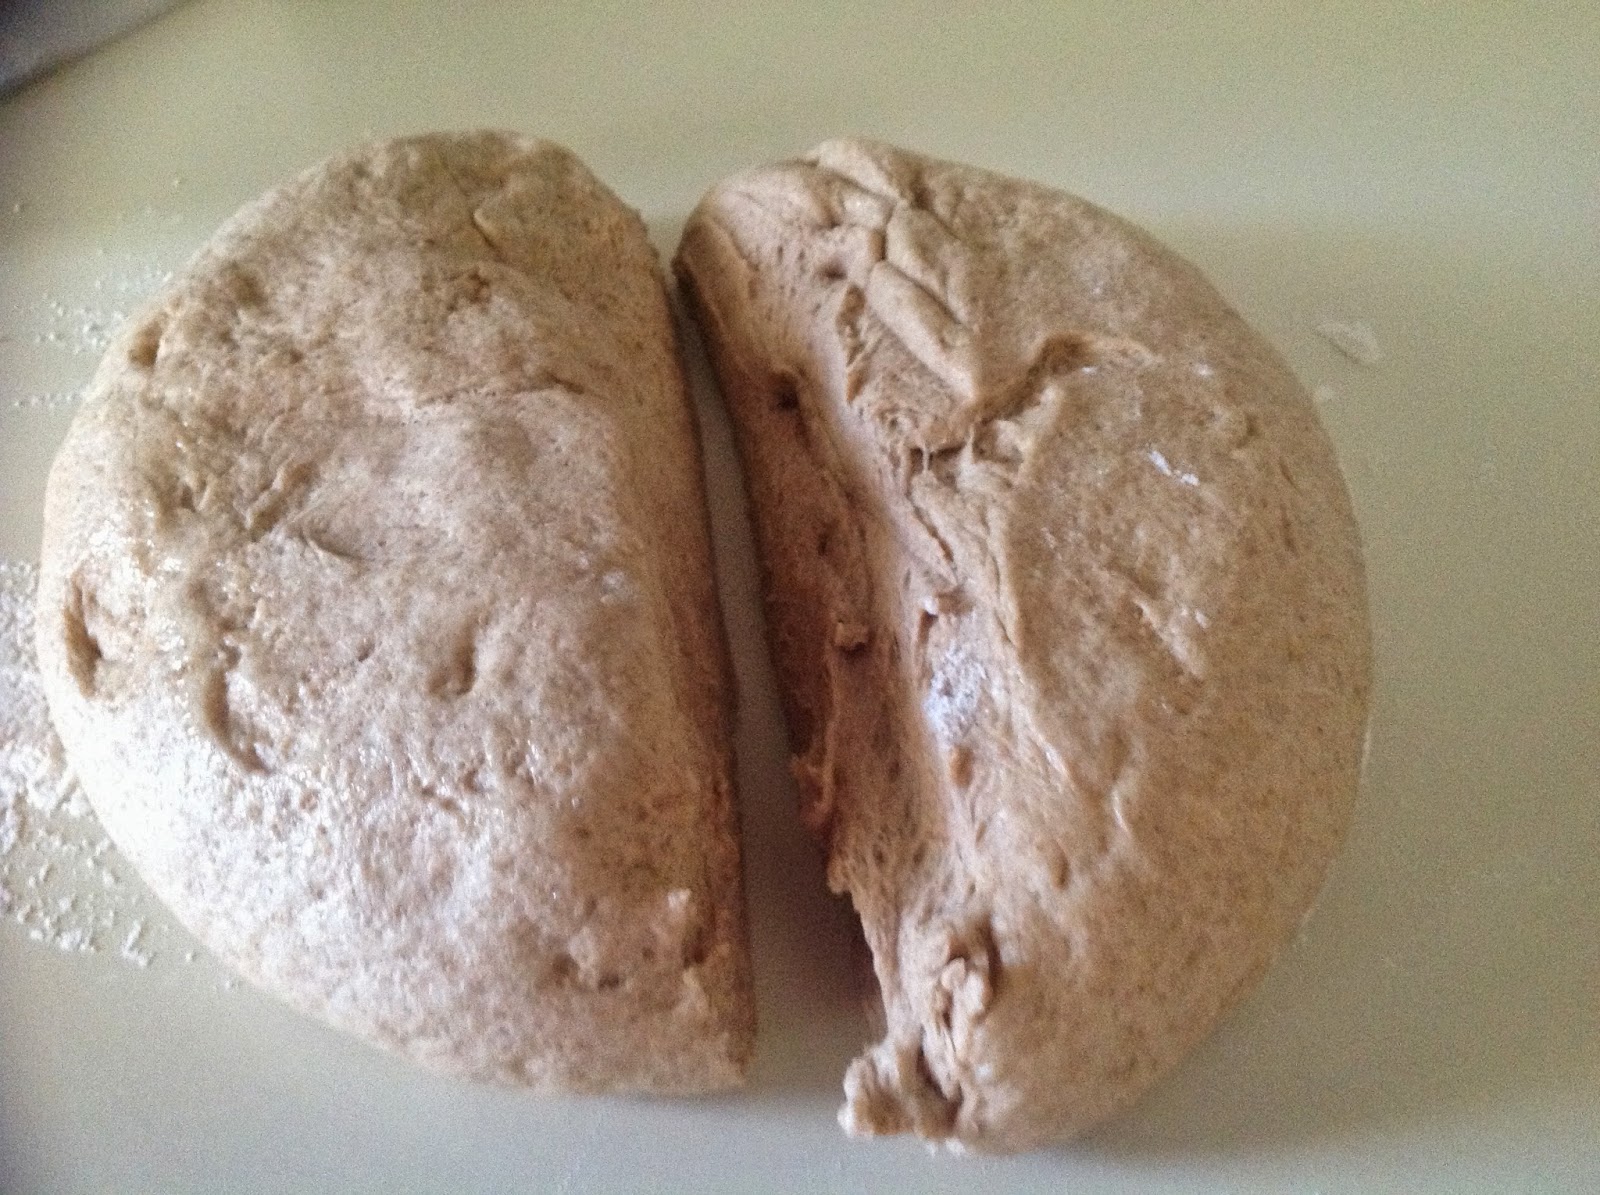
Place the dough on a lightly floured surface and cut it in half. Each half is a loaf.
At this point you have different options. If I am making a loaf of bread, I shape the bread and place it in a greased loaf pan - like this:
If I'm making dinner rolls, I like to make the ones shaped like crescent rolls. To do that, I roll a loaf's worth of dough out into a nice, large circle about 14-15 inches in diameter and about 1/4" or 3/8" thick.
Then, using the pizza cutter, I slice it onto 4 quarters. Then I cut each quarter into 3 pieces, yielding a dozen "slices".
Starting at the widest end, roll each wedge into the shape of a crescent roll. (This is a great time to involve the kiddos - Kelsey is rolling them up in this picture.)
Place them on a greased cookie sheet.
Now, regardless of how you shaped the bread dough - rolls or loaves - you'll need to let it rise again before you bake it. The rule of thumb is to let it double in size if you can. Cover it with a clean cloth again, and wait. This second rise usually takes about 30-60 minutes.
Preheat your oven, then bake a 350 degrees. Rolls are usually done in 15-18 minutes. Loaves take 30-35 minutes. When the come out, brush the tops with butter to give them a nice, rich coloring.
Be prepared; you and the family will want to eat at least half of it as soon as it comes out! That's the best time for bread, you know...
**Note: If you are slicing the bread for sandwiches, it's best to wait until it has mostly cooled. Be sure to use a serrated knife so it will cut smoothly and not squish and tear the bread.
.JPG)
.JPG)
.JPG)