Although I've still been known to weave baskets out of paper, I have a new (and quicker) way to make them. There are several reasons that I still prefer to make our own baskets instead of purchasing them.
1) Memories, memories, memories!
2) As the kids get older, they can pick baskets that reflect their personal taste and styles.
3) I can throw them away when they are empty. I will hold on to Christmas decorations year round, but that's about it as far as holiday decorations goes for me.
So, now for the nitty-gritty. I'm fortunate to have stacks of scrapbooking materials around the house for craft use. For each basket, you will need:
- One 12x12 sheet of cardstock (or an equally sturdy paper)
- Two 12x12 sheets of scrapbooking paper in complementary patterns
You will also need:
- Elmer's glue
- Glue stick
- Scotch tape
- Ruler
- Scissors
- A small square of paper (I used 2 1/2 inches by 2 1/2 inches)

First, take a glue stick and adhere the one of your 12x12 sheets of decorative paper to the cardstock.

Flip it over, and on the cardstock side (i.e. the side you want to show on the inside), place the small paper square into each corner and trace it.

Use the ruler to draw a straight line connecting the inside corners of the squares.

Next, cut ONE side of each of the squares. Be sure you cut the same side of each square (left or right).

Then make a fold along each of the remaining lines showing on the paper.


Now fold the sides up, and with the flaps on the inside, tape the corners.

Be sure and tape down the flaps on the inside of the box, too. At this point, the basket body is assembled, but it needs some finishing touches to make it look nice.

Take you second sheet of paper and fold it in half.

Then open it up and fold the outside edges to the middle again.

With it folded on itself, cut the sheet of paper the same length as your basket. If you are using the 1 1/2 inch square, it'll be 7 inches long.

Open it up, cut it along the folds into four strips, then fold each of those strips in half.

Use your Elmer's glue...

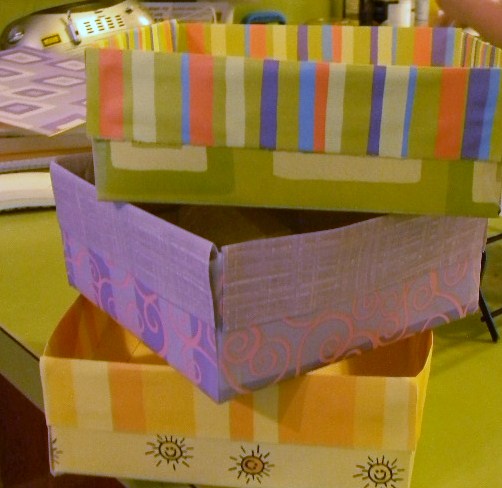
...and adhere to the top edges of the basket.

Now doesn't that look nice??

Set aside to let them dry, then fill with goodies for the kids.

At this point, you can add handles or something if you'd like, but I prefer to leave them this way since they aren't going to last long if you carry them by a handle.
Happy Easter!!
P.S. A special "thanks" goes out to my daughter, Olivia, who was the model for this post. She and Kelsey (age 8) made their own baskets.
P.S. A special "thanks" goes out to my daughter, Olivia, who was the model for this post. She and Kelsey (age 8) made their own baskets.
No comments:
Post a Comment